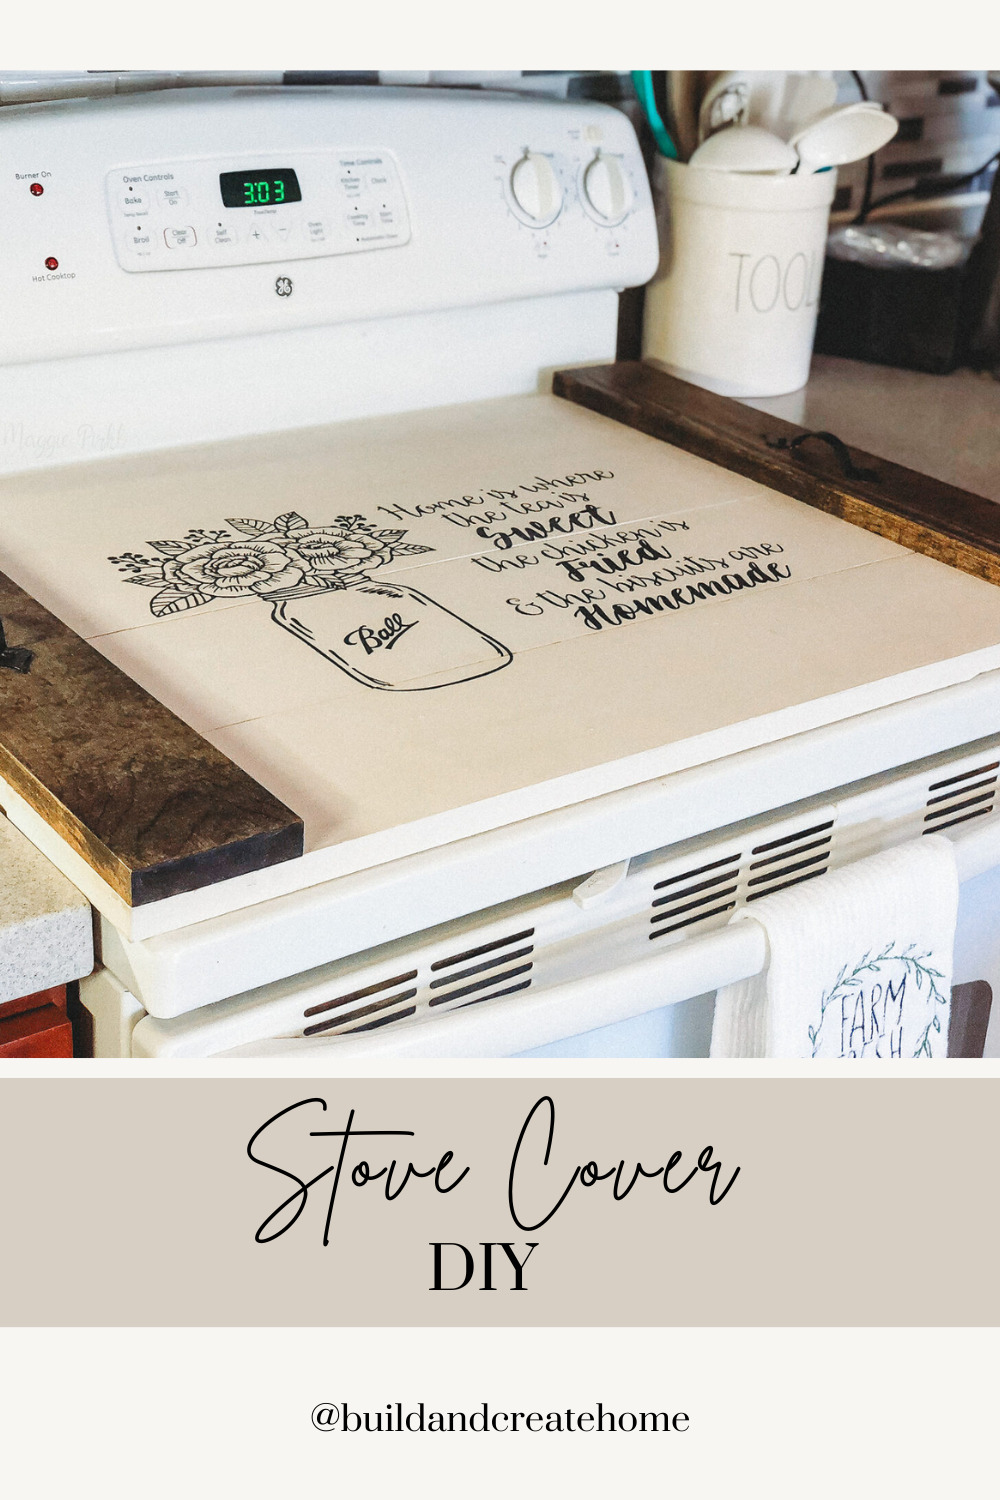
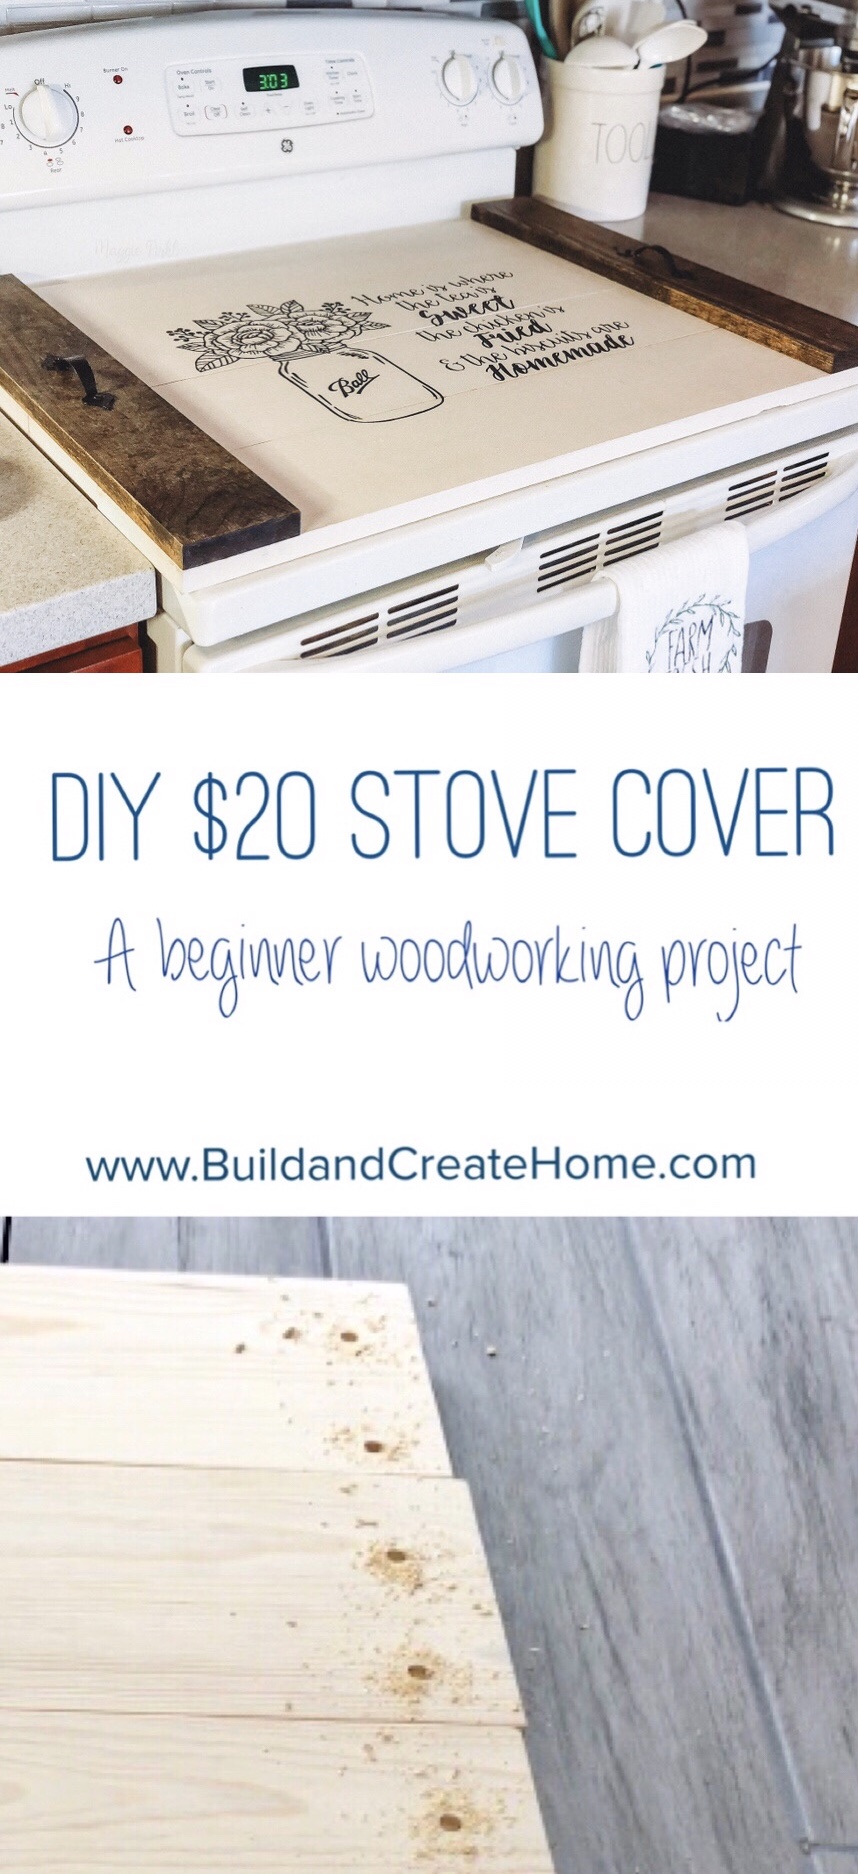
This February you may be looking for a thoughtful *cough* simple *cough* gift! Look no further than this DIY Stove Cover! (Also called noodle boards)! Including handles, this project should only cost $20.
This is a super easy beginner woodworker project that only requires a drill and a saw to cut your lumber.
When I lived in Hawaii I taught some local woodworking classes, and we did these for two classes. The ladies loved making them, and it made me think about what a great gift they would make!
This post contains affiliate links. Please visit my disclosures for more information. Thank you for supporting my blog.
These stove covers are for decorative use only. With the flat bottom, they are best suited for a glass cooktop and are for standard 30″ x 22″ surfaces. Please adjust the plans if your cooktop has different measurements
Supplies to build your stove cover:
You can visit my Amazon page to see what tools and products I typically use.
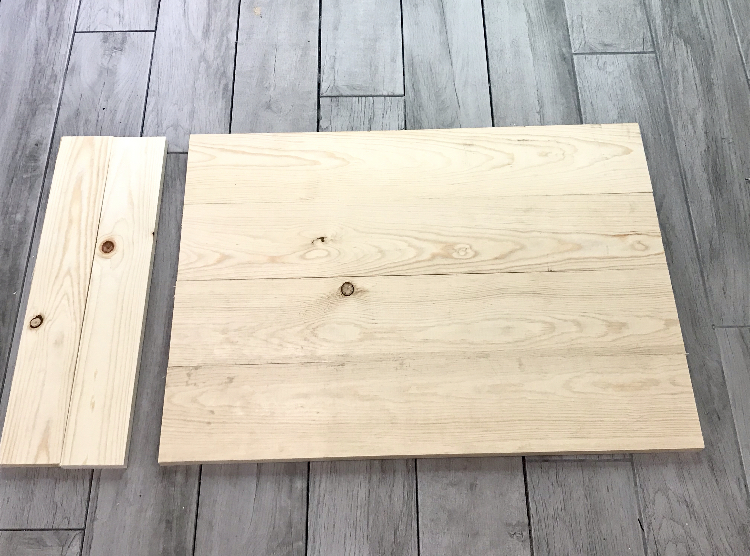
Lumber (I used pine):
– 1 x 6 x 6 (2)
– 1 x 4 x 4 (1)
Hardware:
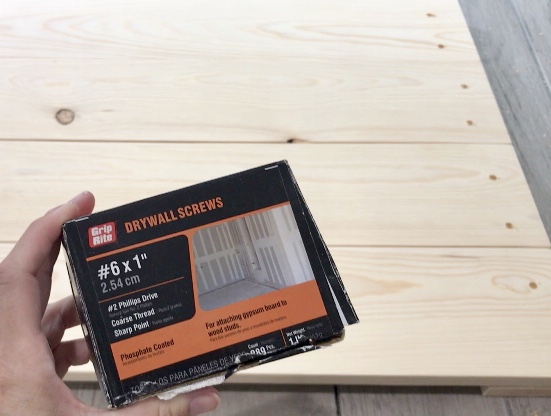
– 1″ screws
– 2 handles
Tools:
– Drill
– Countersink drill bit
-Phillips head bit
– Saw (I used a miter saw)
– Sandpaper (100 grit and 220 should be sufficient for this project)
– Wood glue
Step 1: Cut your lumber
Before using these plans, please measure your stovetop to make sure it will fit. The finished dimensions of this stove cover will be 30″ wide x 22″ deep.
You will need four 1 x 6 pieces cut at 30″ each. Once those are cut, lay them next to each other and measure the width of all four. It should be 22″, but I have found that different mills can vary the lumber width just slightly, so it’s always better to measure first.
Then cut your 1×4 pieces to the length you just measured. Again, this “should” be 22″.
Step 2: Sand and prep lumber for your stovetop cover
I prefer to sand my pieces before assembling and then again once assembled. This is a personal preference, but it will really help get in between the boards. I use a more coarse grit for this initial sanding, so start with 80 or 100 grit depending on what shape your lumber is in.
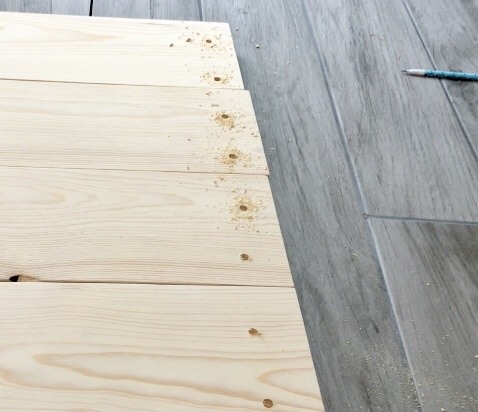
Step 3: Drill countersink holes
Lay out your pieces how you want them. Check for knots and where you’d like those to be on your boards, etc. Once you have it how you want it, flip the entire thing upside down, so the 1×4’s are upside down on the bottom, and the 1x6s are upside down on top of them.
Now drill your countersink holes. You will only want them to go about 1/2 way into your lumber, so be careful you don’t go too deep. If you’re unfamiliar with a countersink bit or what it does, it’s used to carve out a small spot for the head of the screw to sit. That way it won’t be above the lumber and possibly scratch your cooktop.
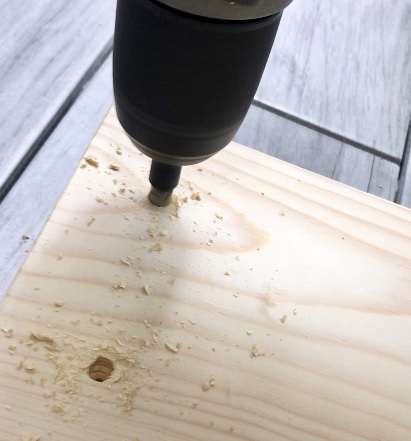
I drilled four holes on each board (two on each side). Just make sure they will catch the 1×4 board below.
Step 4: Glue and assemble the stove cover
Now remove the 1×6 pieces, and make sure you keep them in the correct order, so you know how to place them back down when you’re finished gluing.
Glue:
Apply wood glue to the back of your 1×4’s. Make sure not to get too close to the edges as the glue will expand slightly.

Attach with screws:
Place the 1×6 pieces back on top of the 1×4’s with the countersink holes face up. Align corners well.
I use drywall screws because they’re inexpensive and grab really well. They work great for a simple project like this. I found it easiest to keep it square by driving the first two screws into the front two holes on the front board. Then the back two holes on the backboard. Then you can just fill in the rest!
Step 5: Attach the handles to your stove cover
If you purchased the handles I recommended above, attaching the handles is a snap. Since the screws are inserted through the front, you just need to make sure they’re centered top to bottom and left to right. The exact measurement I got for those Liberty brand handles was 9.25″ from the top of the 1×4 to the center of the top hole in the handle. Then 1.75″ from the side of the board to that same hole.
If you are installing a different handle that works like a drawer pull with the bolt going in the back, you will need to make sure to countersink your holes again to keep your cooktop safe.
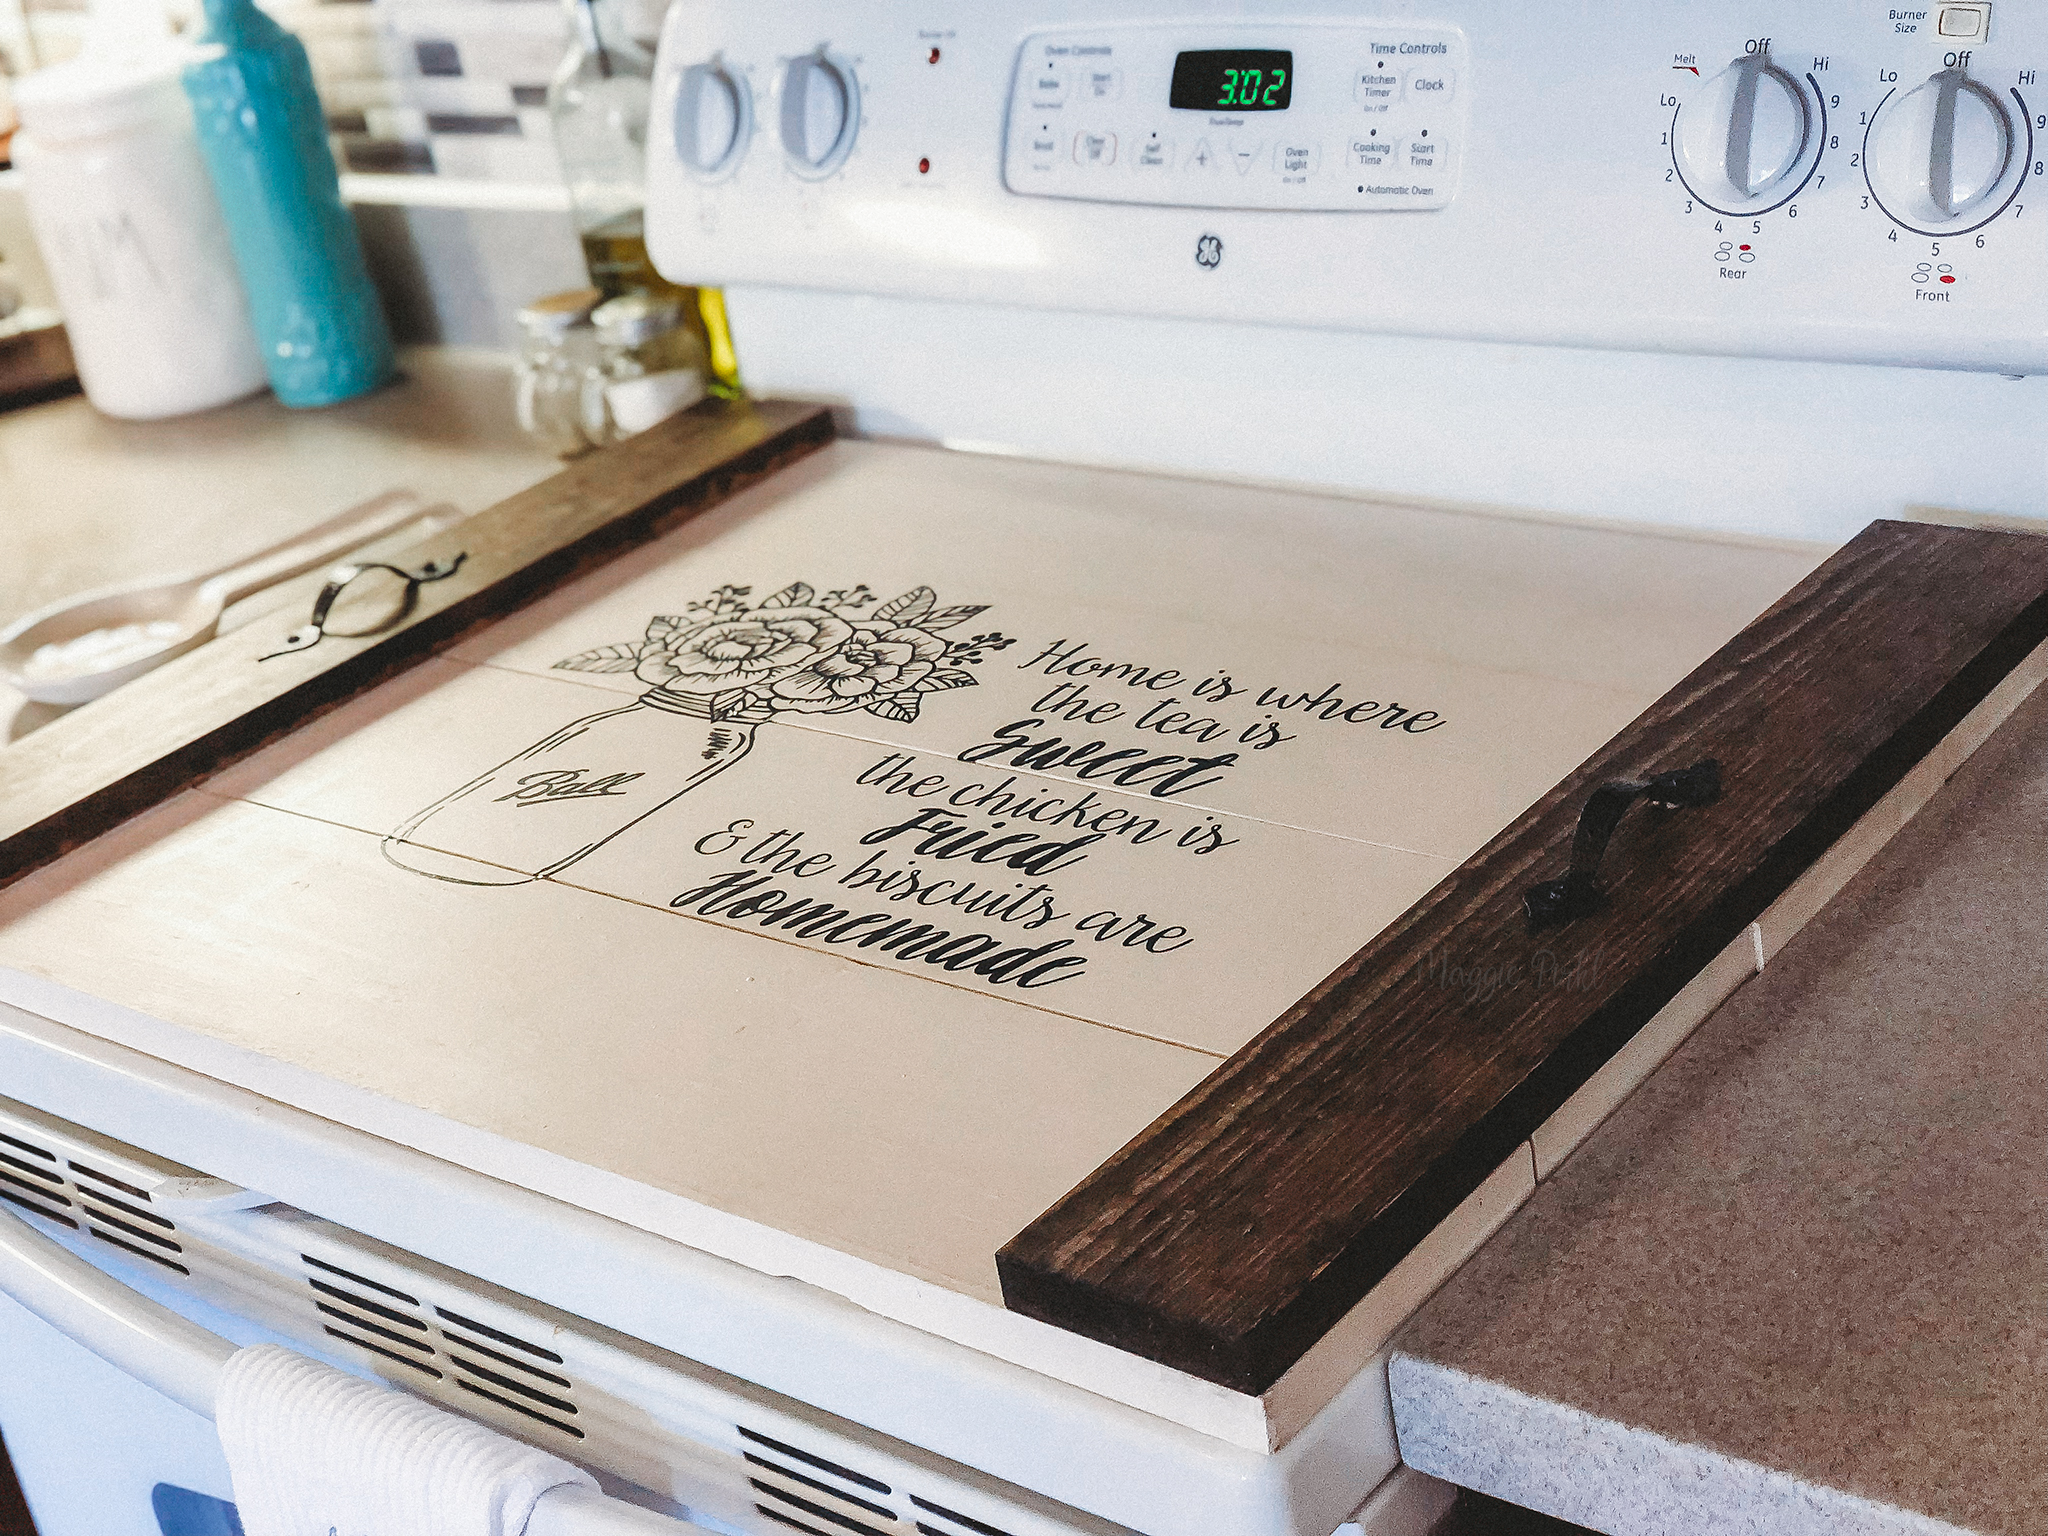
And that’s it! Now you can stain or finish it however you’d like. These are decorative pieces and not meant for handling food, so we did not use food-safe stain for our class.
A few ladies chose to do chalk paint (like me!) as a decorative touch. Just be careful placing hot pots and pans on them since the chalk paint can’t be sealed.
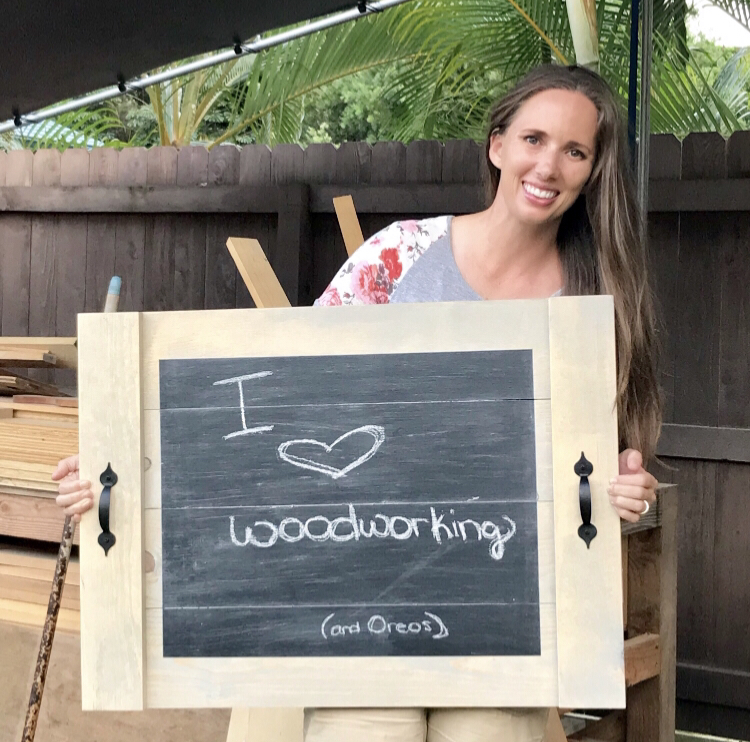
And I have to give a big thank you to one of my students for sharing pics of the stove cover she assembled in my class. Doesn’t it look amazing in her home?! You can visit Maggie’s Instagram feed here. 🙂
And as always, feel free to tag me on Instagram if you make any of my projects. I’d love to feature your builds in my stories!
Fantastic information in an entertaining way!
If you wanted to do this with one large board instead of the panel type, what size and lumbar would you recommend?
You could buy a project panel, but otherwise, you’ll most likely have to use plywood. These are 22″ wide, and large box stores like Home Depot and Lowes don’t carry lumber in that width, unfortunately.
I’ve built Corn hole boards for friends & family and Lowes (where I get my materials) actually have lumber cut 2’x4′ in various thickness. I believe you can also get it 4’x4′..
Where did you get the stencil for the decoration of the noodle board
In the Silhouette design store online. 😉
if you know someone with a cricket machine they can cut what you want and sticks on the board,
I just have a question? Is the stove in the picture an electric one?
It is
Thank you for such easy instructions! I will be making it this coming weekend. My husband is retired Navy, stationed in Hawaii and we are going back for a reunion in August.
Aloha,
Kathy
I’m a bit confused, why drill holes (2 on each end)? I don’t see them on the handle boards? I only see the handles installed…so I’m lost. I know you glue the 4 boards together..after that I got confused. Anything under it? I’m trying to figure out why all those holes?
Thanks so much!!
They are to attach the 1x4s to the 1x6s. In the finished pic, the 1x6s are the white boards, and the 1x4s are the stained boards. Those keep all the 1×6 pieces together. 😉
I am a tad confused…. Four 1 x 6 pieces cut at 30″ each do not equal 22″, they equal 24″ in my book, so how do you get 22′?
thanks
The name 1×6 isn’t the actual size…I know that’s confusing. They’re actually only 5.5″ wide. That’s where the 22 comes from. 😉
what color stain did you use
Beautiful!!!
Where did you get the ball jar w/flowers SVG?
That is Beautiful, I’ve wanted one for a long time maybe I’ll get the time to make one.
This was an awesome post, was looking for a good DIY instructional guide. Yours was the easiest by far to follow
Thanks!
I’ve always wanted one of these! Now thanks to you I can make one!
Cindy
How long does the 1-4 broad need to be for the 22″ and the 1×6 broad.
What size counter sink do you use?
I just made it. It was easy and looks good so far even without any decoration.Thanks
I am so thrilled you made it and are happy with it! If you decide to take a picture, will you tag me on social media? I love to see different takes on these projects!